The beginning of combat.
Ship combat is the essence of sailing in the Deadfire. Whether it's slaver scum, the Principi, or the Rauataians, you will have to confront enemy ships in battle on the open seas and defeat them - for experience, profit, and satisfaction.
Initiation
Ship encounters are started on the world map, once two ships come into contact. If the ship is hostile, you can transition to combat, close to board, or flee.
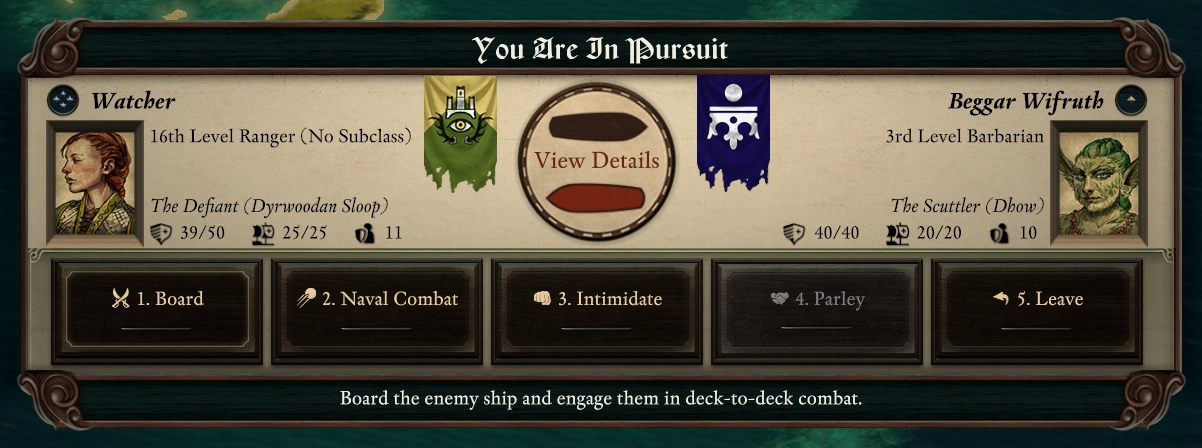
Patch 5.0.0 introduced a number of changes to the ship engagement UI. Prior to the patch, this occurred in a scripted interaction panel. Now it occurs directly on the map screen, and is extended depending whether you are in pursuit or being pursued, adding the ability to intimidate the enemy.
- Enter Combat: Engage in naval combat.
- Begins ship combat
- Close to Board: Board the enemy ship and engage them in deck-to-deck combat.
- Skips ship combat and transitions immediately to close-quarters combat. This simulates ship combat, and will risk hull damage, sail damage and crew casualties (injuries and death).
In pursuit window
Player pursuing enemy only
- Intimidate:
- Attempt to intimidate the opponent into giving up their goods. If you succeed, you gain a number of their resources (gold, food, and drink). If you fail, you enter deck-to-deck combat. If you succeed, you gain:
- Money
 , calculated with
 opponentCaptainCharacterLevel * 50 * opponentCaptainRank - A calculated amount of stacks of Food
 and Drink
  , using
 opponentCaptainRank * 5- Food stacks - Fresh Fruit (always, between 20 and 40).
- Drink stacks - One of the following: Water (10-15), Ale (3-7), Grog (1-3), Rum (1-3)
- Average negative reputation (-4) with the faction of the intimidated ship.
- Money
- Attempt to intimidate the opponent into giving up their goods. If you succeed, you gain a number of their resources (gold, food, and drink). If you fail, you enter deck-to-deck combat. If you succeed, you gain:
- Parley: Request parley and open trade.
- Opens the trade window with the ship (only for merchant and slaver vessels).
- Leave: Peacefully go your separate ways.
- Leave the opponent be, exiting the pursuit window.

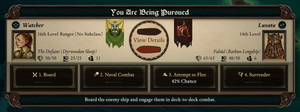
Being pursued window
Enemy pursuing player only
- Attempt to Flee: Attempt to escape. Failure will result in naval combat.
- See below for information regarding flee chance. Successfully fleeing removes the enemy from the world map for a duration. Failing to flee starts ship combat at a initial dual distance of 300.
- Surrender: The enemy allows you to leave, but for a price.
- You must pay a portion of your resources (money, food, drink, medicine, ammo, repair). Succeeds regardless of if you actually have the available resources or not. Prior to patch 5.0.0, surrendering was forced if you lacked a crew (regardless of if the opponent was hostile or not) - rejecting surrender immediately triggered a game over. Surrendering will lose you:
- 15% of current money (minimum of 500, rounded up to nearest integer).
- 30% of current Food and Drink (minimum of 20, rounded up to nearest integer).
- 30% of current Ammunition, Medicine, and Repair (rounded up to nearest integer).
- Gain 1 sailor tales.
- 15% of current money
- You must pay a portion of your resources (money, food, drink, medicine, ammo, repair). Succeeds regardless of if you actually have the available resources or not. Prior to patch 5.0.0, surrendering was forced if you lacked a crew (regardless of if the opponent was hostile or not) - rejecting surrender immediately triggered a game over. Surrendering will lose you:
There are two primary factors to consider when choosing whether to fight to run:
- The size of the enemy ship: You do not want to tangle with a dedicated warship with a dhow. Even if you can deal damage, the cost to repair your own ship and heal up your crew, plus replace resources lost can put you under fast.
- Your own status: Leaving behind a streak of sunk ships is nice, but running into another encounter with damaged hull and sails is far less pleasant. Make sure to keep the ship in good repair and stock up on cannonballs whenever you can.
Flee chance
Should you choose to flee from a pursuing ship (either at engagement, or during combat) your chance to flee is calculated using:
- The difference between the combat speed of each ship, clamped to ±75 (player - opponent).
- The difference between the rank of each captain, clamped to ±5 (player - opponent).
- A multiplier based on your current distance from the opponent (only if you flee during combat, fleeing at engagement is not affected by distance), calculated using
Distance / 600(you need a distance of 600m or more to not be negatively affected by the distance).
The formula is then:
(45 + (rankDifference * 3) + (speedDifference * 0.3) * distanceMultiplier) / 100
A roll between 0 and 1 is made, and if the result is <= the chance, the attempt to flee succeeds.
The base chance to flee is 45%. For each rank above the opponent, you get a bonus +3% chance to flee. For each point in speed above the opponent, you get a bonus +0.3% chance to flee. If the difference is negative (the opponent has a higher rank/speed than yours), this effect is inverted. Note that the chance to flee is limited to a range of 5% to 95%.
If your ship is the Rauatai submarine, fleeing is guaranteed (prior to patch 5.0.0, this was not the case).
You cannot flee if your current and maximum sail health is zero.
Intimidate chance
Intimidating a ship in pursuit is not based on random chance, unlike fleeing. It is determined using:
- The difference between the rank of each captain, clamped to ±5 (player - opponent).
- The difference between the number of defenders on each ship. The number of "defenders" on the player ship is essentially all available companions, plus all available crew members. The number of defenders on the enemy ship varies depending on the ship, as well as the current difficulty. The difference is clamped to between -23 and 10.
The formula is then:
5 + (rankDifference * 5) + (defenderDifference * 3)
In order to successfully intimidate, the resulting value must be greater than 0.
Execution
Unlike regular combat, fights between ships are resolved in a turn based system. Ships start a good distance away from each other (typically a few hundred meters) and the captains decide what action to take.
Both ships have 3 turns each round. At the start of each round, one ship wins the Advantage at random. The roll is modified by each captain's rank and the ship's combat speed. The ship with Advantage acts first for the round, has increased cannon range, and 50% bonus movement speed.
Each turn is divided into a few possible actions. These are:
- Full speed ahead!
- Half sail!
- Hold position!
- Turn to port!
- Turn to starboard!
- Prepare to jibe!
- Fire the port/starboard cannons!
- Report to...
- Brace for impact! (50% to negate Injuries)
- [Surrender.]
Hit chance and Accuracy
Hit chance is the chance of being hit. Accuracy determines the chance of hitting the target.
- Before combat
- Each type of ship has a different hit chance.
- Each rank in cannoneer increase accuracy by 5.
- In combat
- Hit chance is affected by last action.
- Sail:
-0.2 × distancehit chance. - Turn, jibe: -5 hit chance.
- Sail:
- Accuracy is affected by last action, the cannons as well as the relative position of the ships.
- Jibe: -30 accuracy.
- Hold position: +20 accuracy.
- The target ship is in parallel with your firing line: a raking fire, -10 accuracy, +50% damage.
- If the distance between the ships is out of the recommended range, accuracy is decreased proportionally.
Fire!
There are 3 types of shooting:
- Cannonballs nearly always hit an enemy ship's hull and have a low chance of dealing sail damage or belowdeck crew damage.
- Chainshot targets an enemy ship's sail and has a low chance of dealing abovedeck crew damage.
- Grapeshot targets an enemy ship's abovedeck crew and has a low chance of dealing sail damage.
If hit, your attack will cause one of these damage types:
- Hull damage: Once hull health reach 0, the ship sinks.
- Sail damage: Once sail health reach 0, the ship can't turn, jibe, or sail at full speed.
- Crew damage:
- Helmsman (abovedeck): The ship can't turn or jibe.
- Deckhand (abovedeck): The ship can't sail at full speed, or can't sail at all, depending on the total rank of deckhands.
- Surgeon (belowdeck): Resting crew won't heal.
- Cannoneer (belowdeck): The cannons they're in charge of can't fire.
- Injured crew can't be assigned to resolve events.
- If you board the enemy ship and switch to deck-to-deck combat, the enemy injured crew will be treated as knocked out.
Report to...
This can be used to reassign your crew. Use this action to treat your crew injuries or deal with Ship duel events. Note that assigning ship duel events to your crew makes them unavailable, but their post is unchanged.
After combat ends, your reassignment will still be in effect. At which point:
- Any resting crew gains no experience.
- If a crew member gains a rank, they will gain rank in their last assigned post.
Crew injuries
Your crew may be injured during combat. Injured crew cannot take any action. For example, if your cannoneer is injured, you won't be able to fire the cannon they're in charge of.
Use "Report to..." action to move them to resting area. You'll need a surgeon to treat your crew injuries.
Crew injuries remain after combat and take several days or arriving at port to heal. The treatment during combat is only emergency treatment so that they can return to work.
Ship duel events
During ship combat, a number of events can occur as a result of being critically hit by an opposing ships cannon fire. These events often cause immediate (or per turn) sail damage, hull damage, crew damage or resource loss, and have to be resolved over a certain amount of turns, otherwise your ship will continue be negatively affected. Resolving an event simply means transferring available crew away from their stations to the event in order to address the issue. This can be done with the "Report to..." action. The more crew members that are assigned to the event, the faster it will be resolved. Multiple events can be applied to the ship, but some events will supersede others.
Every cannon hit has a chance of being a critical hit, and therefore triggering an event. The crit chance is solely determined by the rank of the Cannoneer manned to the cannon being fired. See Ship crew - Job rank bonuses for more info.
All events have a crew capacity of 4, that is, the amount of crew members that can be assigned to deal with the event.
| Name | Message | Location | Supercedes | Turns to resolve | Effects |
|---|---|---|---|---|---|
Deck Fire |
A fire started on the deck! | Abovedeck | Repair Hull | 12 |
|
Flooding |
The hold began to flood! | Belowdecks | 12 |
| |
Damaged Hull |
Abovedeck | 8 |
| ||
Damaged Sails |
Abovedeck | 8 |
| ||
Sail Fire |
The sails were set on fire! | Abovedeck | Repair Sails | 12 |
|
Sailor Overboard |
A crewmember has fallen overboard! | Abovedeck | 8 |
| |
Torn Sails |
The sails were severely torn! | Abovedeck | 12 |
| |
Unsecured Cargo |
Some cargo was knocked loose! | Belowdeck | 12 |
|
Conclusion
Combat can come to a conclusion in a few different ways:
- Retreat: Only available before initiating combat. If the ship is non-hostile, this will not result in negative effects or morale loss.
- Surrender: Can be chosen at any time during combat, though you will have to pay the price. The enemy ship will demand a portion of your supplies to let you free.
- Fled: Occurs if either ship travels more than 600 meters from the other. Fleeing from an inferior enemy results in -10 crew morale. Enemy ships are only likely to flee if they are inferior, or are merchant ships.
- Sunk: This occurs when a ships hull health reaches zero.
- If The Defiant sinks, you and your party are dead and you'll be forced to reload a save.
- If the enemy ship sinks, you are victorious. This net you morale, crew experience, crew ranks, and a random set of loot - usually an assortment of food, drink, coin, and ship upgrades. Instead of stashing the coin gained, you can choose to share it with the crew for a morale bonus, depending on the amount gained. Move the coin from the loot box to your stash to share only a portion of the coin.
- Defeat: Involved boarding (or being boarded by) the enemy ship.
- If The Defiant is defeated, this is the same as defeat in regular combat. You can choose to re-load the autosave from when you boarded, or one prior.
- If the enemy ship is defeated you gain the same as above, but usually more of it. The loot from the defeated crew members (including clothing, armor and weapons) will also be among the recovered loot.
Strategies
Beginner
At the beginning, you won't have much money so deck out your ship with rewards from quests.
- The Shipwright's Plight gives you 10% discount on Port Shop, a set of 4 Iron Thunderer for a cheap price of 1,000.
- A Sinking Feeling and A Bigger Fish gives you Bardatto Hull and Valera Sails respectively. But their concurrent quest Family Pride should also be dealt with immediately.
If you got Haeferic's Nose, replace one of the Iron Thunderer with it.
- Build
- Ship: Default (Dyrwoodan Sloop).
- Sails: Valera Sails.
- Hull: Bardatto Hull.
- Port cannons: 2 × Iron Thunderer.
- Starboard cannons: 2 × Iron Thunderer.
- Combat
- Approach the enemy ship until it's in range of your cannons (200m-500m in case of Iron Thunderer).
- Turn to port/starboard.
- Repeat these actions:
- Hold position.
- Fire!
- Jibe.
It is important that you hold position before firing as this nets you +20 accuracy, which is very big in the beginning.
Other than that, You'll have to deal with other events as described above.
Flamethrower build
This build focuses on minimizing cost while allowing you to complete ship bounties. It is possible to complete Bounty - Rock-Stomper Rodul with minimum build but you'll want to train your cannoneers by defeating the easier targets first.
Note that this build specializes in taking down bigger ship: Dhow, Galleon, Junk, especially Dhow. It has harder times taking down Voyager and even if you win, the booty is not so good. You'll want to hunt down Dhow for some better booty. The water around Crookspur has a lot of aggressive slaver ships.
- Build
- Ship: Default (Dyrwoodan Sloop).
- Sails: Valera Sails.
- Hull: Bardatto Hull, preferably The Red Dream.
- Port cannons: 2 × Iron Thunderer, preferably Wyrmtongue.
- Starboard cannons: 2 × Magranite Firethrower.
The minimum cost for this build is ![]() 6,400:
6,400:
- Complete The Shipwright's Plight.
- Complete A Sinking Feeling.
- Complete A Bigger Fish.
- Buy 2 × Magranite Firethrower.
Extra costs:
- Buying The Red Dream costs extra 16,000 without discount.
- Buying 2 × Wyrmtongue costs extra 5,400 with discount.
- Combat
- Attack from a distance with port cannons (Iron Thunderer or Wyrmtongue).
- Longship (Rathun) generally has high combat speed and tends to charge right at you. Stop your ship outside the range of your cannons and wait for it to come then fire, aiming at their sails first.
- Voyager, on the other hand, may try to flee when they're at disadvantage. Similarly aim for their sails first, or don't let them get further than 400m.
Versus other ship types.
- Approach the enemy ship and maintain a distance of 75m-150m, optimally 100m. Then bombard it with starboard cannons (Magranite Firethrower).
- The recommended range for Magranite Firethrower is 0m-75m, but if you approach too close, the enemy will try to ram you and bring it to deck-to-deck combat. Of course, if you're sure they won't do that, you should approach as close as you can.
- If you manage to destroy their sail, they'll be incapable of turning, so approach as close to 0m as you can.
- If the enemy turns the bow of their ship to you, be careful and take some distance.
- If the enemy turns the stern of their ship to you, try to take out their sails. If you succeed, your victory is guaranteed (as you as you don't run out of cannonballs).
Versus Fyrgist's ship - The Heaving Harlot. This Junk's decked out with powerful cannons and manned by high level crew. It can be a challenging combat. You'll want your crew at maximum possible rank and some luck.
- The enemy's portside has 3 × Vailian hullbreaker and 2 × Double bronzer. If they turn these cannons at you, run as far as you can. Getting hit by these can sink your puny sloop in one shot.
- The enemy's starboard has 3 × Imperial long gun, 2 × Wyrmtongue. If they turn these cannons at you, approach and duke it out with them. The Imperial long guns have a high chance of missing, but the Wyrmtongues can be a problem. Your Magranite Firethrowers still have the advantage in damage output so you can win with some luck.
- First, let's assume the enemy will use starboard cannons, your chance of winning is slim otherwise.
- Approach the ship, aiming for 75m distance.
- Start the combat by normally aiming at the hull. After a few rounds, if it looks like you can quickly take out their sails, switch your target to the sails, destroy it, then approach as close you can. You'll want to take out their sails or sink them while they're still using starboard cannons.
- You'll probably lose the first few times so remember to save before trying.
- You'll get Kapana Taga if you win.